

AgentX runs and keeps track of AI agents for a team. A message arrives from a tool the team already uses, AgentX picks the right agent, starts it, and records what happened. When some work belongs on another computer, AgentX connects the machines so they can pass tasks to each other.
That last part is the hardest to picture from a description, so the first thing to do with AgentX is watch it. The demo starts three AgentX daemons on your computer, joins them into a small network, and plays one scenario: a customer reports a broken checkout, the support agent hands the code fix to an engineering agent on another machine, and the result comes back.
This is part 1 of AgentX in practice, a series of short guides where each part gets one thing working. Here, the one thing is the demo.
What you get at the end
- Three AgentX daemons running on your computer, each pretending to be a different machine:
laptop-paris,vps-nycandpi-office. - The AgentX dashboard open in your browser, showing all three.
- One task that has travelled from the
@cxagent onlaptop-paristo the@builderagent onvps-nycand back. - The record of that task, which you can read with one command.
What is real and what is not. The daemons, the network calls between them, the authentication and the records are all real. Only the model replies are scripted, so nothing calls a paid AI model and you need no account or API key. The demo does not touch any real agents or credentials you may already have.
AgentX is part of Noqta's products program and it is still experimental. The demo is the safest place to meet it: it runs entirely on your machine and cleans up after itself.
Prerequisites
- Node.js 22.19 or newer, up to 26. AgentX refuses to start on other versions. This guide was run on Node.js 22.22.0.
- A terminal (Terminal on macOS, a shell on Linux, PowerShell or WSL on Windows).
- A browser to look at the dashboard.
- About two minutes for the first run, because
npxdownloads the AgentX package. On our machine the first run took 69 seconds from the command to the end of the scenario.
You do not need Git, Docker, an account, an API key or a copy of the source code.
Step 1: Check your Node.js version
In a terminal, run:
node --versionOur output:
v22.22.0If the number is below v22.19 or above v26, install Node.js 22 from nodejs.org and run the command again.
Step 2: Start the demo
Pick an empty folder, because the demo writes its working files into a folder called .agentx-demo wherever you run it. Then run:
npx agentix-cli demoThe package is called agentix-cli; the command it installs is agentx. If npx asks Need to install the following packages: agentix-cli, answer y.
To get exactly what this guide shows, pin the version we tested:
npx agentix-cli@0.114.1 demoAgentX releases often, so a newer version may word a line differently. The steps stay the same.
On a server or without a browser, add --no-open. The demo then prints the dashboard address and you open it yourself.
Step 3: Read the startup lines
After the download, the demo prints a short banner and starts the three daemons. This is our run, trimmed of npm download warnings. We ran it with --base-port 19021, so our port numbers are 19021 to 19023 and 19031. Yours will be 18921 to 18923 and 18931 unless you change the base port.
  agentx demo — one message, three machines (simulated on loopback)
  Canned model responses. Real daemons, real A2A mesh, real ledger.
  Run `agentx setup` to wire real agents.

  Startup limit: 60s per step (default for load 3.8 on 8 CPUs)
  ▸ laptop-paris starting on 127.0.0.1:19021 (log: .../.agentx-demo/node-a/daemon.log)
  ▸ vps-nyc starting on 127.0.0.1:19022 (log: .../.agentx-demo/node-b/daemon.log)
  ▸ pi-office starting on 127.0.0.1:19023 (log: .../.agentx-demo/node-c/daemon.log)
  ✓ three daemons up
  ✓ dashboard up
  ✓ A2A mesh healthy — agent cards exchanged across three nodes

  Dashboard:   http://127.0.0.1:19031/live  (all three nodes via the mesh)
  Daemon APIs: 127.0.0.1:19021 · 127.0.0.1:19022 · 127.0.0.1:19023
What each part means:
- Three daemons. A daemon is AgentX's background service. Each one here plays a separate machine and has its own folder (
node-a,node-b,node-c) with its own configuration and log. - Dashboard. The browser interface. It runs on the base port plus 10.
- A2A mesh healthy. A2A means agent-to-agent. The connected machines form a mesh, and each machine has published a card describing its agents. This line is the one that matters: the three machines can reach each other.
- Startup limit. How long each startup step may take before the demo gives up. It is 60 seconds by default and longer on a busy machine.
Step 4: Watch the scenario in the terminal
Straight after startup, the demo plays its scenario. Our run, trimmed:
  ── Scenario: red pipeline, cross-node fix ──

  You → @cx (laptop-paris)
  [demo] Customer reports checkout is broken and CI is red on demo/shop. Handle it.

  @cx (laptop-paris)
  Checkout failure traced to the red pipeline on demo/shop. This needs a code fix — delegating to @builder on the vps-nyc node over the mesh. I'll report back on this thread.

  ⇄ mesh hop: laptop-paris → vps-nyc (A2A /task)

  @builder (vps-nyc)
  Fixed. checkout.test.ts assumed the legacy crypto.webcrypto import — patched for Node 22, suite green locally. Opened MR !47 on demo/shop; pipeline is green. Handing back to @cx.

  (...)

  Inspect the run: http://127.0.0.1:19031/live  ·  ledger rows on each node record every dispatch

  Daemons stay up — browse the dashboards. Press Enter to replay, Ctrl-C to exit.
Read it as a relay:
- You send a message to
@cx, the customer-facing agent onlaptop-paris. @cxdecides this is a code problem, not a support question, and hands it to@builder.- The
mesh hopline is the hand-off: a real HTTP request from one daemon to another, authenticated with a token the three machines share. @builderonvps-nycreports the fix and hands back.@cxcloses the loop with the customer (the line we trimmed as(...)).
The wording of each reply is scripted. The routing is not: @cx really sent the task across the mesh, and @builder really received it on another daemon.
Step 5: Look at the dashboard
Your browser opened the dashboard on the Live tab. If it did not, open the Dashboard: address from Step 3.
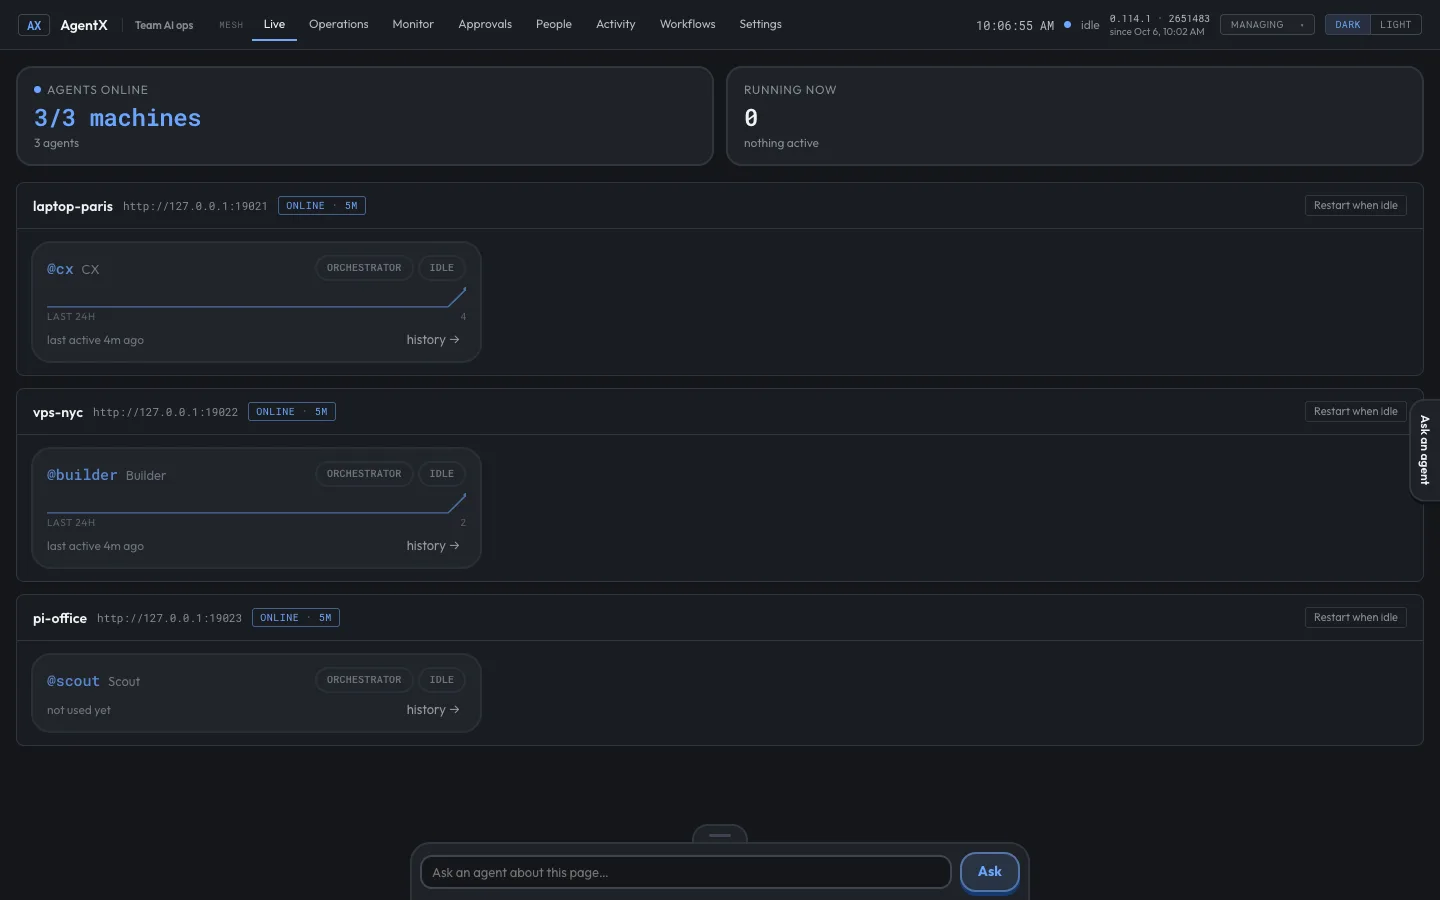
Live shows every machine in the mesh and the agents on it. The demo should show 3/3 machines and three agents. @cx and @builder have activity in the last 24 hours; @scout on pi-office says not used yet, because the scenario never needs it.
Now open Activity in the top bar.
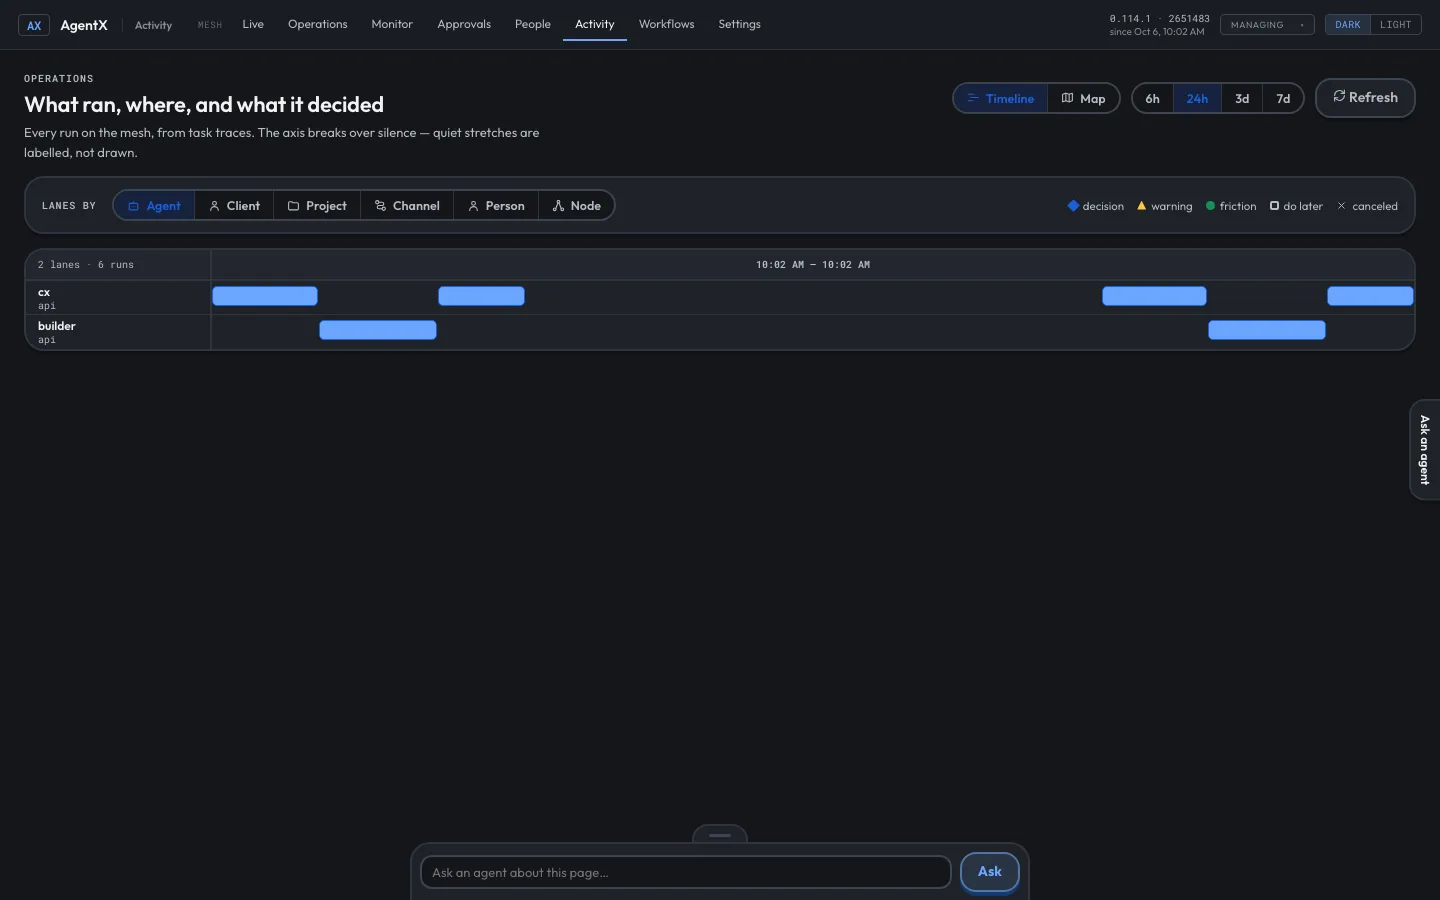
Activity draws every run on a timeline, one lane per agent. The bars alternate between cx and builder because the task went from one to the other and back. Each time you replay the scenario, new bars appear.
Then open Monitor.
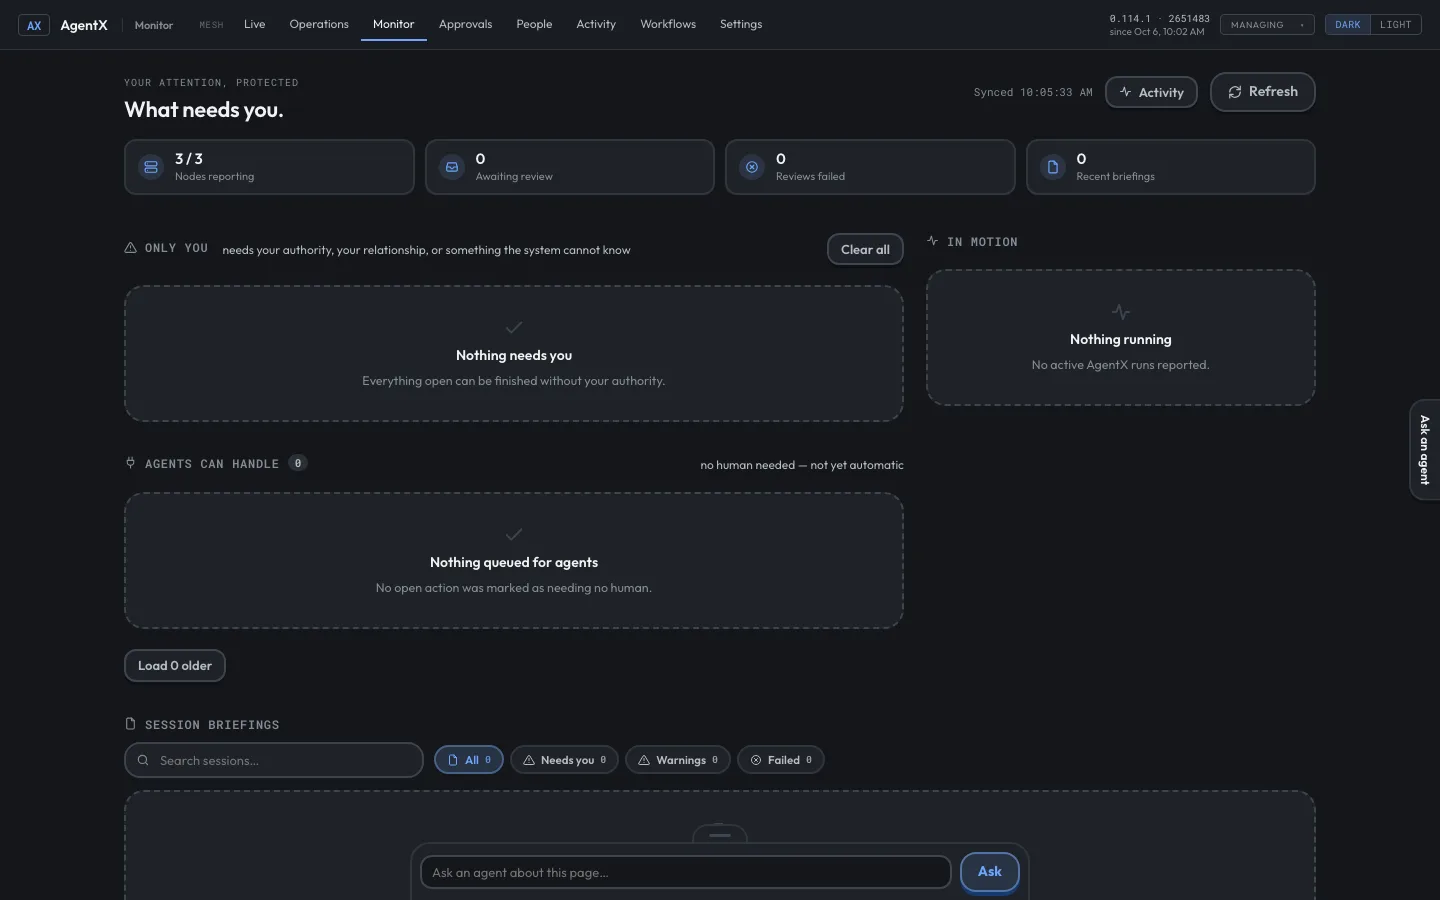
Monitor is the page for work that needs a person. In the demo it says Nothing needs you, which is correct: the scenario finished without anyone having to decide anything. The demo is a tour of routing, not a filled-in copy of a business, so some views stay empty.
Step 6: Replay it, then stop it
Back in the terminal:
- Press Enter to play the scenario again. We did, and the same relay ran a second time, with new bars on the Activity timeline.
- Press Ctrl-C to stop. The three daemons and the dashboard shut down, the ports are freed, and the
.agentx-demofolder is deleted.
If you only want one run and then an automatic stop, start the demo with --once:
npx agentix-cli demo --onceStep 7 (optional): Read the record of what happened
Every hand-off is written to a record AgentX calls the ledger. @cx even says so in its last reply. To read it, the ledger has to survive the shutdown, so run the demo once with --keep:
npx agentix-cli demo --once --keepThen move into the folder of the first machine and ask for a summary:
cd .agentx-demo/node-a
npx agentix-cli ledger stats
Our output after one scenario:
Events by source
source  n
------  -
mesh    2

Decisions: 2
outcome     n
----------  -
dispatched  2

Divergences: 0
  (no rows)

In-flight (dispatched, no resolution): 0
And the events themselves, newest first:
npx agentix-cli ledger events -n 4at source project subject intent
------------------- ------ ------- ------------- ---------
2026-10-06 09:09:21 mesh - mesh:agent:cx mesh.task
2026-10-06 09:09:15 mesh - mesh:agent:cx mesh.taskTwo events reached @cx on laptop-paris over the mesh: your opening message and @builder's report coming back. Both were dispatched, and nothing is left in flight. This is the part of AgentX that does not show up in a chat window: after the fact, you can see where every piece of work went.
When you are done, delete the .agentx-demo folder.
Useful options
All of these were run for this guide on 0.114.1.
| Option | What it does |
|---|---|
--no-open | Do not open the browser; just print the dashboard address |
--once | Play the scenario once, then shut everything down |
--keep | Keep the .agentx-demo folder when the demo stops |
--base-port 19021 | Use ports 19021 to 19023 for the daemons and 19031 for the dashboard |
--startup-timeout 120 | Give each startup step up to 120 seconds on a slow machine |
Check it worked
- The terminal printed
A2A mesh healthy. - The scenario printed a
mesh hop: laptop-paris → vps-nycline. - The Live tab shows
3/3 machines. - The Activity tab shows bars in both the
cxandbuilderlanes.
If all four are true, the demo worked, and you have seen the core idea of AgentX: one message, routed to the right agent, across machines, with a record of each step.
Troubleshooting
The first run seems stuck. It is downloading the package. Wait two minutes before doing anything else. On later runs it starts in seconds.
A demo is already running somewhere else. Stop it first. We tested starting a second demo on the same ports while the first was running: it did not fail. It printed three daemons up and played its scenario against the first demo's daemons, and the extra runs appeared in the first demo's Activity tab. If you see more runs than you played, this is why. Stop the other demo with Ctrl-C, or give this one its own ports:
npx agentix-cli demo --base-port 19021The dashboard is then on port 19031.
AgentX needs Node.js 22.19 or newer, up to 26. Your Node.js is too old or too new. Install Node.js 22 and check with node --version. (This message is quoted from the AgentX source; we did not reproduce it for this guide.)
The browser did not open. Open the Dashboard: address printed in the terminal. On a server, start the demo with --no-open and reach the address from that machine.
A startup step times out on a slow or busy computer. Give it more time with --startup-timeout 120.
ledger stats shows no rows. You are in the wrong folder or the demo was not run with --keep. The ledger lives inside .agentx-demo/node-a, and without --keep that folder is deleted on exit.
Watch it
The first Learn AgentX video shows the same demo: youtu.be/J_QC6QCsSBs.
Next in the series
Part 2 installs AgentX for real and checks the installation with agentx doctor. Until then, the AgentX documentation is at github.com/anis-marrouchi/agentx, and our article on how multi-agent knowledge systems work in production explains why we built it.
Conclusion
In a few minutes, with no account, you started three AgentX daemons, watched a task cross from one machine to another, saw it in the dashboard, and read the record it left. Everything except the model's words was real. The next step is to replace the scripted replies with a real model and a real agent.
If you want agents like these running on your own team's tools, with the routing and the record kept for you, talk to us.